11. Server Inrichting
Hier staat de inrichting beschreven voor de Linux Server (Ubuntu) met FOSS geo-toepassingen. Dit betreft een Ubuntu-server waarop allerlei basis en geo-gerelateerde packages zijn toegevoegd.
11.1. Conventies
Bij het inrichten van een server is het zeer belangrijk om vaste conventies aan te houden. De algemene conventies staan hier beschreven.
11.1.1. Directories
Het voordeel van een Linux systeem is dat er altijd vaste directories zijn waarbij een heldere scheiding is tussen programma’s, data, bibliotheken, configuratie etc. Daarnaast is het goed om voor additionele directories een vaste conventie te hebben. Deze is als volgt:
/optadditionele, handmatig geinstalleerde software/opt/<leverancier of product>/<product-versie>installatie dirs voor additionele, handmatig geinstalleerde software/opt/downloaddownloads voor additionele, handmatig geinstalleerde software/opt/bineigen additionele shell scripts (bijv. backup)/var/sensorsalle eigen (geo)data, configuraties, tilecaches, packed backups to be transfered/var/wwwalle web applicaties/sites/var/www/sensors.geonovum.nl/sitesensors website (platte HTML)/var/www/sensors.geonovum.nl/webappsalle Tomcat applicaties: GeoServer, GeoWebCache, deegree etc/var/www/sensors.geonovum.nl/cgi-binproxy en python scripts/home/sadminhome dir beheer account
Onder /opt/<leverancier of product> kan vaak ook een dynamic link staan naar de laatste versie
van een product, bijvoorbeeld /opt/nlextract/active is een dynlink naar een versie van NLExtract bijvoorbeeld
naar /opt/nlextract/1.1.5.
Voeg ook toe in /etc/profile zodat de scripts in /opt/bin gevonden worden
export PATH=/opt/bin:${PATH}
Omdat de meeste toepassingen gebruik maken van Apache Virtual Hosts met een prefix op sensors, zoals
bijvoorbeeld inspire.sensors is hier ook een conventie op zijn plaats:
/etc/apache2/sites-available/sensors.geonovum.nl.confbevat de Apache configuratie/var/www/sensors.geonovum.nlbevat de website content (HTML etc)
11.1.2. Systeem
Aangeschaft 7 mei 2014.
[vps44500 systeeminformatie]
IPv4 address..: 185.21.189.59
IPv6 address..: 2a02:348:a1:bd3b::1
Hostname......: vps44500.public.cloudvps.com
Image.........: ubuntu1404-bare.conf
RAM...........: 8192MB
Disk..........: 240 GB
Cpus..........: 3
11.1.3. Host
Host is sensors.geonovum.nl IP sensors.geonovum.nl has address 185.21.189.59
In /etc/hosts shorthand sensors toegevoegd, voor o.a. vhosts apache.
11.1.4. Accounts
Elke server krijgt 2 standaard accounts: root (“root admin”) en sadmin (“sensors admin”). NB de account root
wordt (door Ubuntu) nooit aangemaakt als login account!
Het beheer-account root heeft root-rechten.
Het account sadmin heeft ook wat rechten maar minder.
Dit account heeft lees/schrijfrechten op directories voor custom installaties (zie onder),
de websites onder /var/www behalve partner-projecten en data/configuratie directories onder /var/sensors.
$ id sadmin
uid=1001(sadmin) gid=1002(sadmin) groups=1002(sadmin)

$ id root
uid=0(root) gid=0(root) groups=0(root)
11.1.5. Software Installatie
Alle verdere software is via de Ubuntu/Debian Advanced Packaging Tool (APT) gedaan.
Hiermee is op zeer eenvoudige wijze niet alleen alle software, inclusief de meeste GIS tools
gemakkelijk te installeren, maar ook up-to-date te houden. Bijvoorbeeld een complete Java installatie gaat met :
apt-get install sun-java6-jdk. APT wordt altijd door het root account (met root via sudo of sudo -i) uitgevoerd.
Alleen in een uiterst geval waarbij een software product niet in het APT systeem zit of niet
in een gewenste versie is een handmatige (“custom”) installatie gedaan. Hierbij is de volgende conventie aangehouden:
custom installaties worden door het account root.
11.1.6. Backup
Systeem backup met deze tool http://www.cloudvps.com/community/knowledge-base/cloudvps-backup-script-introduction:
[CloudVPS Backup Account]
Server........: backup-030.cloudvps.com
Username......: vps44500
Quota.........: 20 GB
Protocols.....: SFTP, FTP and rsync over SSH
De configuratie kan evt geregeld worden met: /root/cloudvps-backup-installer.sh
Ik heb nu de email recipients aangepast naar
Er draait elke nacht (om 01:41 , zie crontab -l) een backup
$ crontab -l
41 1 * * * /usr/local/bin/cloudvpsbackup > /dev/null 2>&1
Config onder /etc/cloudvps/, maar edit deze via /root/cloudvps-backup-installer.sh.
Logfiles staan onder: /var/log/backups/.
11.1.7. Disk Gebruik
Op 25.5.14, na install alle support tools en server software, zonder data.
$ df -h
Filesystem      Size  Used Avail Use% Mounted on
/dev/xvda1      237G  4.5G  220G   2% /
none            4.0K     0  4.0K   0% /sys/fs/cgroup
udev            3.9G  4.0K  3.9G   1% /dev
tmpfs           788M  204K  787M   1% /run
none            5.0M     0  5.0M   0% /run/lock
none            3.9G     0  3.9G   0% /run/shm
none            100M     0  100M   0% /run/user
11.1.8. Java Monitor
Zie http://java-monitor.com. Hiermee wordt voortdurend de status/gezondheid van de Tomcat Java server gemonitored. Indien er een probleem is wordt email gestuurd.
# download probe
# unpack in /opt/java-monitor.com
# drop war in /var/www/sensors.geonovum.nl/webapps
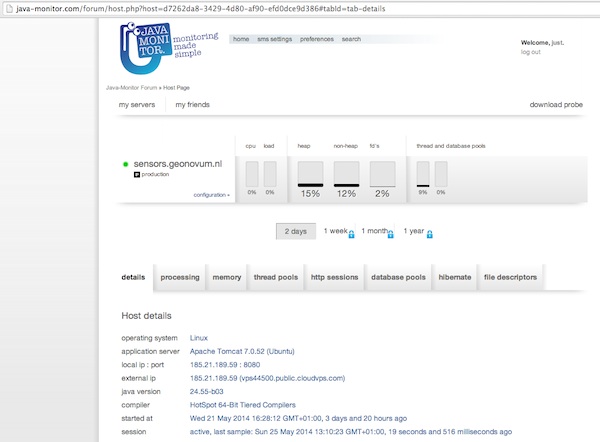
Figure 1 - Java Monitor
11.2. Server Software - Algemeen
Hieronder standaard packages.
11.2.1. Apache Web Server
De standaard Apache web server (versie 2).
# installatie apache package (default installs mpm worker)
apt-get install apache2
apt-get install apache2-utils

# in /etc/apache2/apache2.conf zet
# ServerName sensors
Zet servertokens to Minimal in /etc/apache2/conf-available/security.conf
Website: /var/www/sensors.geonovum.nl
$ mkdir /var/www/sensors.geonovum.nl
$ mkdir /var/www/sensors.geonovum.nl/site     HTML site
$ mkdir /var/www/sensors.geonovum.nl/cgi-bin  proxy scripts etc
$ mkdir /var/www/sensors.geonovum.nl/admin    admin site
$ mkdir /var/www/sensors.geonovum.nl/webapps  java servers (.war deploy)
De uiteindelijke config in /etc/apache2/sites-available/sensors.geonovum.nl.conf
<VirtualHost sensors:80>
    ServerName sensors.geonovum.nl

    DocumentRoot /var/www/sensors.geonovum.nl/site

   ScriptAlias /cgi-bin/ /var/www/sensors.geonovum.nl/cgi-bin/
    <Directory "/var/www/sensors.geonovum.nl/cgi-bin">
         AllowOverride None
         Options +ExecCGI -MultiViews +SymLinksIfOwnerMatch
         Order allow,deny
         Allow from all
    </Directory>

    ServerAdmin just@justobjects.nl

    DirectoryIndex index.html index.php index.jsp

    Alias /sadm "/var/www/sensors.geonovum.nl/sadm"
   <Directory "/var/www/sensors.geonovum.nl/sadm">
        Options Indexes FollowSymlinks MultiViews
        AuthType Basic
        AuthName "Sensors Admin"
        AuthUserFile /etc/apache2/.htpasswd
        Require user sadmin

        AllowOverride None
        Order allow,deny
        Allow from all

    </Directory>

    <Location /tomcat/examples>
      ProxyPass ajp://sensors:8009/examples
      ProxyPassReverse http://sensors/examples
    </Location>

    <Location /gs>
      ProxyPass ajp://sensors:8009/gs
      ProxyPassReverse http://sensors/gs
    </Location>

    <Location /sos>
      ProxyPass ajp://sensors:8009/sos
      ProxyPassReverse http://sensors/sos
    </Location>

    LogFormat "%h %l %u %t \"%r\" %>s %b \"%{Referer}i\" \"%{User-agent}i\"" combined
    CustomLog /var/log/apache2/sensors.geonovum.nl-access.log combined
    ErrorLog /var/log/apache2/sensors.geonovum.nl-error.log

</VirtualHost>
Site aktiveren met a2ensite sensors.geonovum.nl.
Dit wordt de beheer site http://sensors.geonovum.nl/sadm. Wachtwoord zetten met:
htpasswd -c /etc/apache2/.htpasswd sadmin
Maak een hidden link voor website administratie en beveilig deze met een htaccess paswoord.
11.2.2. Java
Java van Oracle installeren. Niet OpenJDK (ivm GeoServer problemen). Kan/mag niet via Ubuntu maar via PPA: https://launchpad.net/~webupd8team/+archive/java. Die download weer van Oracle...
Zie: http://www.webupd8.org/2012/01/install-oracle-java-jdk-7-in-ubuntu-via.html
Stappen.
$ add-apt-repository ppa:webupd8team/java
Oracle Java (JDK) Installer (automatically downloads and installs Oracle JDK6 / JDK7 / JDK8). There are no actual Java files in this PPA.

More info:
- for Oracle Java 7: http://www.webupd8.org/2012/01/install-oracle-java-jdk-7-in-ubuntu-via.html
- for Oracle Java 8: http://www.webupd8.org/2012/09/install-oracle-java-8-in-ubuntu-via-ppa.html

Debian installation instructions: http://www.webupd8.org/2012/06/how-to-install-oracle-java-7-in-debian.html
More info: https://launchpad.net/~webupd8team/+archive/java
Press [ENTER] to continue or ctrl-c to cancel adding it

gpg: keyring `/tmp/tmp09u8e2c5/secring.gpg' created
gpg: keyring `/tmp/tmp09u8e2c5/pubring.gpg' created
gpg: requesting key EEA14886 from hkp server keyserver.ubuntu.com
gpg: /tmp/tmp09u8e2c5/trustdb.gpg: trustdb created
gpg: key EEA14886: public key "Launchpad VLC" imported
gpg: Total number processed: 1
gpg:               imported: 1  (RSA: 1)
OK

    $ apt-get update

    $ apt-get install oracle-java7-installer
Resultaat
$ java -version
java version "1.7.0_55"
Java(TM) SE Runtime Environment (build 1.7.0_55-b13)
Java HotSpot(TM) 64-Bit Server VM (build 24.55-b03, mixed mode)
11.2.3. Tomcat
Zie https://help.ubuntu.com/13.10/serverguide/tomcat.html.
Installeren
$ apt-get install tomcat7

# check
$ lynx localhost:8080
Logs in /var/log/tomcat7/.
Config in /etc/tomcat7, met name /etc/tomcat7/server.xml.
Verder, documentatie, manager en voorbeelden.
    $ apt-get install tomcat7-docs
$ apt-get install tomcat7-admin
$ apt-get install tomcat7-examples
Schrijfrechten in /etc/tomcat7.
    $ chgrp -R tomcat7 /etc/tomcat7
    $ chmod -R g+w /etc/tomcat7
    $ ls -l /etc/tomcat7
drwxrwxr-x 3 root tomcat7   4096 May  9 13:47 Catalina
-rw-rw-r-- 1 root tomcat7   6426 Feb 27 13:18 catalina.properties
-rw-rw-r-- 1 root tomcat7   1394 Jan 25 21:13 context.xml
-rw-rw-r-- 1 root tomcat7   2370 Feb 21 07:11 logging.properties
drwxrwxr-x 2 root tomcat7   4096 May  9 13:48 policy.d
-rw-rw-r-- 1 root tomcat7   6500 Feb 27 13:18 server.xml
-rw-rw---- 1 root tomcat7   1530 Jan 25 21:13 tomcat-users.xml
-rw-rw-r-- 1 root tomcat7 162905 Jan 25 21:13 web.xmlusers.xml
-rw-rw-r-- 1 root tomcat7 162905 Oct 26  2012 web.xml
Manager user aanmaken (sadmin).
Access to the manager application is protected by default:
you need to define a user with the role “manager-gui” in /etc/tomcat7/tomcat-users.xml before you can access it.
<user username="sadmin" password="*" roles="manager-gui,admin-gui"/>
The second one is the host-manager webapp, which you can access by default at http://sensors.geonovum.nl:8080/host-manager. It can be used to create virtual hosts dynamically.
Access to the host-manager application is also protected by default: you
need to define a user with the role “admin-gui” in /etc/tomcat7/tomcat-users.xml before you can access it.
Koppelen van Tomcat met de Apache server gaat via mod_proxt_ajp een standaard onderdeel
van Apache. Enablen van deze module (in de Host):
a2enmod proxy_ajp
In /etc/tomcat7/server.xml AJP enablen.
<Connector port="8009" protocol="AJP/1.3" redirectPort="8443" />
In Apache configuraties moet dan elke request voor de Tomcat webapp via de AJP Proxy naar Tomcat geleid worden. Een voorbeeld is hier voor Tomcat voorbeelden binnen vanaf de Host naar de base Geoserver, http://sensors.geonovum.nl
<Location /tomcat/examples>
  ProxyPass ajp://sensors:8009/examples
  ProxyPassReverse http://sensors/examples
</Location>
En users aan tomcat groep toevoegen.
usermod -aG tomcat7 sadmin
usermod -aG tomcat7 root
Zet JAVA_OPTS in /etc/init.d/tomcat7.
JAVA_OPTS="-Djava.awt.headless=true -server -Xmx2048M -Xms512M -XX:SoftRefLRUPolicyMSPerMB=36000
 -XX:MaxPermSize=512m -XX:+UseParallelGC"
Later gezet naar:
JAVA_OPTS="-Djava.awt.headless=true -server -Xmx3072M -Xms512M -XX:SoftRefLRUPolicyMSPerMB=36000
-XX:MaxPermSize=1024m -XX:+UseParallelGC"
NB JAVA_OPTS op standaard plek zetten /etc/init.d/tomcat7 (in ‘if’ statement) werkte niet!!
Gezet na execute $DEFAULT, dan pakt ie wel op!!
testen: http://sensors.geonovum.nl/tomcat/examples/jsp/jsp2/el/basic-arithmetic.jsp, OK!
Virtual hosts vvia Apache en koppelen aan domein. In /etc/tomcat7/server.xml voeg toe.
<Host name="sensors.geonovum.nl" appBase="/var/www/sensors.geonovum.nl/webapps"
unpackWARs="true" autoDeploy="true">
<Alias>sensors</Alias>
<!-- Access log processes all example.
Documentation at: /docs/config/valve.html
Note: The pattern used is equivalent to using pattern="common" -->
<Valve className="org.apache.catalina.valves.AccessLogValve" directory="logs"
prefix="sensors_access_log." suffix=".txt"
pattern="%h %l %u %t "%r" %s %b" />
</Host>
Toevoegen in /etc/apache2/sites-available/sensors.geonovum.nl.conf
<Location /gs>
  ProxyPass ajp://sensors:8009/gs
  ProxyPassReverse http://sensors/gs
</Location>

<Location /sos>
  ProxyPass ajp://sensors:8009/sos
  ProxyPassReverse http://sensors.geonovum.nl/sos
</Location>
Logfiles volgen van Tomcat: tail -f /var/log/tomcat7/catalina.out.
11.3. Server Software - Geo
11.3.1. Extra Package Sources
Ubuntu GIS, https://wiki.ubuntu.com/UbuntuGIS. Voor laatste versies belangrijkste FOSS geo-tools.
    apt-get install python-software-properties
    add-apt-repository ppa:ubuntugis/ubuntugis-unstable
    add-apt-repository ppa:kakrueger/openstreetmap
apt-get update
Helaas nog niet beschikbaar voor Ubuntu 14.04 (Trusty) !!!
11.3.2. PostgreSQL en PostGIS
PostgreSQL is een OS relationele database (RDBMS). PostGIS is een extentie die van PostgreSQL een ruimtelijke (spatial) database maakt. Installatie gaat via APT
$ apt-get install postgis postgresql postgresql-contrib
 Setting up postgresql (9.3+154) ...
 Setting up postgresql-contrib-9.3 (9.3.4-1) ...
 Setting up postgresql-contrib (9.3+154) ...
 Setting up odbcinst (2.2.14p2-5ubuntu5) ...
 Setting up odbcinst1debian2:amd64 (2.2.14p2-5ubuntu5) ...
 Setting up libgdal1h (1.10.1+dfsg-5ubuntu1) ...
 Setting up postgis (2.1.2+dfsg-2) ...

# create users (bijv oase) with this pattern
su postgres
createuser sensors
psql template1
alter user sensors password '***';
\q
Server Instrumentation, met admin pack.
$ sudo -u postgres psql
psql (9.1.10)
Type "help" for help.

postgres=# CREATE EXTENSION adminpack;
CREATE EXTENSION
Installatie controleren met
psql -h localhost -U postgres template1

 $ pg_lsclusters
 Ver Cluster Port Status Owner    Data directory               Log file
 9.3 main    5432 online postgres /var/lib/postgresql/9.3/main /var/log/postgresql/postgresql-9.3-main.log
Enablen locale connecties in /etc/postgresql/9.3/main/pg_hba.conf.
# Database administrative login by Unix domain socket
local   all             postgres                                md5

# TYPE  DATABASE        USER            ADDRESS                 METHOD

# "local" is for Unix domain socket connections only
local   all             all                                     md5
# IPv4 local connections:
host    all             all             127.0.0.1/32            md5
# IPv6 local connections:
host    all             all             ::1/128                 md5
Evt postgres wachtwoord resetten: http://stackoverflow.com/questions/12720967/is-possible-to-check-or-change-postgresql-user-password
Beheer van PostgreSQL via web met phppgadmin.
$ apt-get install phppgadmin
# Get:1 http://us.archive.ubuntu.com/ubuntu/ saucy/main php5-pgsql amd64 5.5.3+dfsg-1ubuntu2 [65.3 kB]
# Get:2 http://us.archive.ubuntu.com/ubuntu/ saucy/main libjs-jquery all 1.7.2+dfsg-2ubuntu1 [78.8 kB]
# # Get:3 http://us.archive.ubuntu.com/ubuntu/ saucy/main postgresql-doc-9.1 all 9.1.10-1 [1,607 kB]
# Get:4 http://us.archive.ubuntu.com/ubuntu/ saucy/main postgresql-doc all 9.3+146really9.1+148 [6,416 B]
# Get:5 http://us.archive.ubuntu.com/ubuntu/ saucy/universe phppgadmin all 5.1-1 [704 kB]

# restart apache
ln -s /usr/share/phppgadmin /var/www/default/<geheim> (onder admin)

 # edit /etc/phppgadmin/config.inc.php
 // If extra login security is true, then logins via phpPgAdmin with no
 // password or certain usernames (pgsql, postgres, root, administrator)
 // will be denied. Only set this false once you have read the FAQ and
 // understand how to change PostgreSQL's pg_hba.conf to enable
 // passworded local connections.
 $conf['extra_login_security'] = false;
Postgis en template opzetten. Ook dit nodig om Postgis extension aan te maken.
$ apt-get -s install postgresql-9.1-postgis-2.1
Reading package lists... Done
Building dependency tree
Reading state information... Done
The following extra packages will be installed:
  postgresql-9.1-postgis-scripts
The following NEW packages will be installed:
  postgresql-9.1-postgis-2.1 postgresql-9.1-postgis-scripts
0 upgraded, 2 newly installed, 0 to remove and 3 not upgraded.
Inst postgresql-9.1-postgis-scripts (2.1.0-5~saucy1 ubuntugis-unstable:13.10/saucy [all])
Inst postgresql-9.1-postgis-2.1 (2.1.0-5~saucy1 ubuntugis-unstable:13.10/saucy [amd64])
Conf postgresql-9.1-postgis-scripts (2.1.0-5~saucy1 ubuntugis-unstable:13.10/saucy [all])
Conf postgresql-9.1-postgis-2.1 (2.1.0-5~saucy1 ubuntugis-unstable:13.10/saucy [amd64])
Anders krijg je op CREATE EXTENSION postgis dit
ERROR: could not open extension control file "/usr/share/postgresql/9.1/extension/postgis.control": No such file or directory
Template DB``postgis2`` opzetten.
    su postgres
    createdb postgis2
psql -h localhost postgis2
postgis2=# CREATE EXTENSION postgis;
# CREATE EXTENSION
postgis2=# CREATE EXTENSION postgis_topology;
# CREATE EXTENSION
Ook in PostGIS staat goede RD geconfigureerd (towgs84 ontbreekt dit keer niet!!).
+proj=sterea +lat_0=52.15616055555555 +lon_0=5.38763888888889
+k=0.9999079 +x_0=155000 +y_0=463000 +ellps=bessel
+towgs84=565.417,50.3319,465.552,-0.398957,0.343988,-1.8774,4.0725
+units=m +no_defs
Ook 900913 (Google) is goed.
De databasepostgis2zal steeds als PostgrSQLtemplateworden gebruikt bij het aanmaken van specifieke database zoalsgeorzlabeninspire. Door de update inspatial_ref_sysis dan de goede RD configuratie, maar het is goed om altijd te controleren.
Test met dump inlezen. Haal dump met.
wget http://data.nlextract.nl/opentopo/workshop/geodata/bag-jan13-gooi-eo.backup

    createdb -U postgres  -T postgis2 bag
pg_restore -d bag -U postgres bag-jan13-gooi-eo.backup
Lijkt goed te gaan. Alleen metatabellen (onder VIEWs geometry_columns) nakijken.
Bijv.
select ST_AsEWKT(geopunt)  from bag_test.adres limit 3;
                                 st_asewkt
-------------------------------------------
 SRID=28992;POINT(119657.88 480340.86 0)
 SRID=28992;POINT(119846.04 478236.32 0)
 SRID=28992;POINT(118514.126 476795.241 0)
11.3.3. GeoServer
GeoServer via Apache-AJP-Tomcat.
- .war van GS-download onder
/opt/geoserver/<versie>als gs.war- bijv
/opt/geoserver/2.5.0/gs.war- eigen config in
/var/sensors/config/geoserver- in
/etc/init.d/tomcat7:export GEOSERVER_DATA_DIR=/var/sensors/config/geoserver- deploy door
cp /opt/geoserver/2.5.0/gs.war /var/www/sensors.geonovum.nl/webapps/gsis gemakkelijker als korte naam/URL- de URL wordt
http://sensors.geonovum.nl/gs/<evt workspace>
Om permissie-problemen te voorkomen doen we.
chown -R tomcat7:tomcat7 /var/www/sensors.geonovum.nl/webapps
chown -R tomcat7:tomcat7 /var/sensors/config/geoserver
GeoServer was upgraded to 2.8.0 on oct 10, 2015.
11.3.4. Sensorweb SOS Server
“The OGC Sensor Observation Service aggregates readings from live, in-situ and remote sensors. The service provides an interface to make sensors and sensor data archives accessible via an interoperable web based interface.”
Installatie van de INSPIRE version of SOS server from 52North.
From Simon Jirka 19.05.14: “We have now packaged together a new installation file of the INSPIRE SOS together with the REST interface:
http://52north.org/files/sensorweb/INSPIRE/52N-SOS-INSPIRE-with-RestAPI_20140519.zip
The ZIP archive also contains a short README file with a link to the installation guide and some additional information on the INSPIRE SOS. “
Deze ondersteunt OGC SOS 1.0 en 2.0 standaard en is de OGC referentie implementatie voor SOS. Daarnaast is ook REST en INSPIRE support toegevoegd voor deze versie. De installatie is net als standaard 52N SOS server met paar uitzonderingen voor INSPIRE config.
Zie http://52north.org/communities/sensorweb/sos/index.html . Installatie volgens instructies op https://wiki.52north.org/bin/view/SensorWeb/SensorObservationServiceIVDocumentation#Installation
- database aangemaakt: naam ‘sensors’ template postgis2, user ‘sensors’
- database schema aangemaakt in DB ‘sensors’: naam: ‘sos’ (tbv SOS server tables)
- Apache proxy:
Als volgt in /etc/apache2/sites-available/sensors.geonovum.nl.conf (sensors is localhost naam zoals in /etc/hosts)
  <Location /sos>
    ProxyPass ajp://sensors:8009/sos
    ProxyPassReverse http://sensors/sos
  </Location>

* SOS-download onder ``/opt/52north/sos/20140519``
* war file hernoemen naar sos.war en install: ``cp sos.war /var/www/sensors.geonovum.nl/webapps/``
* via ``tail -f /var/log/tomcat7/catalina.out &`` logfile volgen
* server aktief op ``http://sensors.geonovum.nl/sos``
* melding "You first have to complete the installation process! Click here to start it."
* Wizard stappen volgen, schema 'sos' binnen database, daarna via Batch InsertSensor/InsertObservation
* Service URL is ``http://sensors.geonovum.nl/sos/sos``
* moet endpoint aangeven: bijv http://sensors.geonovum.nl/sos/sos/kvp?service=SOS&request=GetCapabilities
“Please enter credentials to login into the administrator panel below. You can reset your admin password by executing the file sql/reset_admin.sql (located inside the SOS installation directory in the webapps folder of your application server) on your database. Problemen: memory out of heap,
Tomcat instellingen naar
``JAVA_OPTS="-Djava.awt.headless=true -server -Xmx3072M -Xms512M -XX:SoftRefLRUPolicyMSPerMB=36000 -XX:MaxPermSize=1024m -XX:+UseParallelGC"`` .
Followed de README.
After deploying the WAR file open the SOS page in a browser (http://sensors.geonovum.nl/sos) and follow the installation steps:

1) Datasource configuration: Select PostgreSQL/PostGIS as datasource
   - Enable the Multi language support checkbox in the Advanced Database configuration section  (DONE)
   - Re-Installations: Uncheck the Create tables checkbox in the Actions section
2) Settings:
   - CRS ( optional): Change the default CRS and limit the supported CRS  (LEFT AS IS)
   - I18N: Set the default language as ISO 639-2/B alpha 3 code  (DONE, set to 'dut')
   - INSPIRE: Change value if necessary  (LEFT AS IS)
3) Follow the instructions
Verdere gegevens:
- Logfile: /var/lib/tomcat7/logs/52n-sos-webapp.log
11.3.4.1. Patches
Since the install from 19052014, the following patches were applied.
- 20140519-patch:
85658 May 21 17:26 coding-sensorML-v101-4.0.2-SNAPSHOT.jar - 20140612-patch:
do-core-0.1.3-SNAPSHOT.jarandhibernate-common-4.0.2-SNAPSHOT.jar
The 20140612-patch solves 2 issues:
- all Observation identifiers were listed in GetCapabilities: https://github.com/Geonovum/sospilot/issues/2
- observable property needed to be unique: https://github.com/Geonovum/sospilot/issues/3
Replaced
-rw-r--r-- 1 tomcat7 tomcat7   23436 May 19 10:58 do-core-0.1.3-SNAPSHOT.jar
-rw-r--r-- 1 tomcat7 tomcat7  289999 May 19 10:58 hibernate-common-4.0.2-SNAPSHOT.jar
-rw-r--r-- 1 tomcat7 tomcat7   63249 May 19 10:58 cache-4.0.2-SNAPSHOT.jar

with

-rw-r--r-- 1 tomcat7 tomcat7   23529 Jun 12 14:21 do-core-0.1.3-SNAPSHOT.jar
-rw-r--r-- 1 tomcat7 tomcat7  289876 Jun 12 14:21 hibernate-common-4.0.2-SNAPSHOT.jar
-rw-r--r-- 1 tomcat7 tomcat7   72842 Jul  1 16:41 cache-4.0.2-SNAPSHOT.jar
Patching is done by: Stop Tomcat, Copy patch .jar to
/var/www/sensors.geonovum.nl/webapps/sos/WEB-INF/lib, Start Tomcat.
11.4. Installatie - ETL Tools
11.4.1. ImageMagick
Handig voor alllerlei image conversies, oa in gebruik bij NLExtract en MapFish Print.
apt-get install imagemagick

# 8:6.7.7.10-5ubuntu3
11.4.2. XSLT Processor
Zie http://en.wikipedia.org/wiki/XSLT. XSLT (XSL Transformations) is a declarative, XML-based language used for the transformation of XML documents into other XML documents.
Installatie van XSLT processor voor commandline. o.a. gebruikt voor INSPIRE GML transformaties.
apt-get install xsltproc
11.4.3. GDAL/OGR
Volgens de website www.gdal.org.
GDAL is a translator library for raster geospatial data formats that is released under an X/MIT style Open Source license by the Open Source Geospatial Foundation. The related OGR library (which lives within the GDAL source tree) provides a similar capability for simple features vector data.
Installatie is simpel via APT.
$ apt-get install gdal-bin python-gdal

0 upgraded, 1 newly installed, 0 to remove and 0 not upgraded.
Inst gdal-bin (1.10.1+dfsg-5ubuntu1 Ubuntu:14.04/trusty [amd64])
Conf gdal-bin (1.10.1+dfsg-5ubuntu1 Ubuntu:14.04/trusty [amd64])
Setting up python-numpy (1:1.8.1-1ubuntu1) ...
Setting up python-gdal (1.10.1+dfsg-5ubuntu1) ...
11.4.4. Stetl - Streaming ETL
Zie http://stetl.org
Eerst alle dependencies!
apt-get install python-pip
apt-get install python-lxml
apt-get install postgresql-server-dev-9.3
apt-get install python-gdal libgdal-dev
apt-get install python-psycopg2
Normaal doen we pip install stetl maar nu even install uit Git vanwege
te verwachten updates.Install vanuit GitHub versie onder /opt/stetl/git.
$ mkdir /opt/stetl
$ cd /opt/stetl
$ git clone https://github.com/geopython/stetl.git git
$ cd git
$ python setup.py install

$ stetl -h
# 2014-05-25 13:43:40,930 util INFO running with lxml.etree, good!
# 2014-05-25 13:43:40,931 util INFO running with cStringIO, fabulous!
# 2014-05-25 13:43:40,936 main INFO Stetl version = 1.0.5
Installatie Testen.
$ which stetl
# /usr/local/bin/stetl

cd /opt/stetl/git/examples/basics
./runall.sh
# OK!
11.4.5. Python Jinja2
Nodig voor Stetl Jinja2 templating Filter.
pip install jinja2
Downloading/unpacking jinja2
  Downloading Jinja2-2.7.3.tar.gz (378kB): 378kB downloaded
  Running setup.py (path:/tmp/pip_build_root/jinja2/setup.py) egg_info for package jinja2

    warning: no files found matching '*' under directory 'custom_fixers'
    warning: no previously-included files matching '*' found under directory 'docs/_build'
    warning: no previously-included files matching '*.pyc' found under directory 'jinja2'
    warning: no previously-included files matching '*.pyc' found under directory 'docs'
    warning: no previously-included files matching '*.pyo' found under directory 'jinja2'
    warning: no previously-included files matching '*.pyo' found under directory 'docs'
Downloading/unpacking markupsafe (from jinja2)
  Downloading MarkupSafe-0.23.tar.gz
  Running setup.py (path:/tmp/pip_build_root/markupsafe/setup.py) egg_info for package markupsafe

Installing collected packages: jinja2, markupsafe
  Running setup.py install for jinja2

    warning: no files found matching '*' under directory 'custom_fixers'
    warning: no previously-included files matching '*' found under directory 'docs/_build'
    warning: no previously-included files matching '*.pyc' found under directory 'jinja2'
    warning: no previously-included files matching '*.pyc' found under directory 'docs'
    warning: no previously-included files matching '*.pyo' found under directory 'jinja2'
    warning: no previously-included files matching '*.pyo' found under directory 'docs'
  Running setup.py install for markupsafe

    building 'markupsafe._speedups' extension
    x86_64-linux-gnu-gcc -pthread -fno-strict-aliasing -DNDEBUG -g -fwrapv -O2 -Wall -Wstrict-prototypes -fPIC -I/usr/include/python2.7 -c markupsafe/_speedups.c -o build/temp.linux-x86_64-2.7/markupsafe/_speedups.o
    markupsafe/_speedups.c:12:20: fatal error: Python.h: No such file or directory
     #include <Python.h>
                        ^
    compilation terminated.
    ==========================================================================
    WARNING: The C extension could not be compiled, speedups are not enabled.
    Failure information, if any, is above.
    Retrying the build without the C extension now.


    ==========================================================================
    WARNING: The C extension could not be compiled, speedups are not enabled.
    Plain-Python installation succeeded.
    ==========================================================================
Successfully installed jinja2 markupsafe
Cleaning up...
11.5. Installatie - Project Software
Software en documentatie voor project zit in Geonovum GitHub: https://github.com/Geonovum/sospilot
We installeren deze onder /opt/geonovum/sospilot
cd /opt/geonovum/sospilot
git clone https://github.com/Geonovum/sospilot.git git
NB alle documentatie (Sphinx) wordt automatisch gepubliceerd naar ReadTheDocs.org: http://sospilot.readthedocs.org via een GitHub Post-commit hook.
11.6. Installatie - Ontwikkeltools
Hieronder de installaties voor de verschillende tools mbt software ontwikkelen.
11.6.1. Ant - Java Build Tool
Volgens de Ant website.
Apache Ant is a Java-based build tool. In theory, it is kind of like Make, but without Make’s wrinkles.
Installatie:
apt-get install ant
ant -version
# Apache Ant(TM) version 1.9.2 compiled on July 14 2013
#
# /usr/share/ant contains install
11.6.2. Maven - Lifecycle Tool
Volgens de Maven website.
Apache Maven is a software project management and comprehension tool. Based on the concept of a project object model (POM), Maven can manage a project’s build, reporting and documentation from a central piece of information.
Installatie:
$ apt-get install maven2
$ mvn -version
# Apache Maven 2.2.1 (rdebian-10)
# Java version: 1.7.0_45
# Java home: /usr/lib/jvm/java-7-oracle/jre
# Default locale: en_US, platform encoding: UTF-8
# OS name: "linux" version: "3.11.0-12-generic" arch: "amd64" Family: "unix"

# configuratie (globaal) in
# /usr/share//maven2/conf

# per-user conf en repository in ~/user/.m2 bijv
# /home/sadmin/.m2
Hmm, we should have used the standard apt-get install maven to get Maven 3...
On July 11, 2014, did
$ apt-get remove maven2
$ apt-get install maven
11.6.3. Git - Source Code Beheer
apt-get install git-core Zie https://help.ubuntu.com/13.10/serverguide/git.html
11.6.4. ncdump - dumping NetCDF files
Used for extracting a.o. KNMI weather data files. Install
apt-get install netcdf-bin
11.6.5. weewx - Weather Station server
Used for testing weewx.
Dir: /opt/weewx. We do custom install as user sadmin in order to make tweaking easier.
See http://www.weewx.com/docs/setup.htm
Steps.
# Install Dependencies
# required packages:
apt-get install python-configobj
apt-get install python-cheetah
apt-get install python-imaging
apt-get install fonts-freefont-ttf  # Fonts in reporting

# optional for extended almanac information:
apt-get install python-dev
pip install pyephem

# Weewx install after download
cd /opt/weewx
tar xzvf archive/weewx-2.7.0.tar.gz
ln -s weewx-2.7.0 weewx

cd weewx

# Change install dir in setup.cfg as follows
# Configuration file for weewx installer. The syntax is from module
# ConfigParser. See http://docs.python.org/library/configparser.html

[install]

# Set the following to the root directory where weewx should be installed
home = /opt/weewx/weewxinst

# Given the value of 'home' above, the following are reasonable values
prefix =
exec-prefix =
install_lib = %(home)s/bin
install_scripts = %(home)s/bin

# build en install in /opt/weewx/weewxinst
./setup.py build
./setup.py install

# link met aangepaste configs uit Geonovum GitHub (na backup oude versies)
ln -s /opt/geonovum/sospilot/git/src/weewx/test/weewx.conf /opt/weewx/weewxinst
ln -s /opt/geonovum/sospilot/git/src/weewx/test/skin.conf /opt/weewx/weewxinst/skins/Standard
ln -s /opt/geonovum/sospilot/git/src/weewx/test/weatherapidriver.py /opt/weewx/weewxinst/bin/user

# test OK
sadmin@vps44500:/opt/weewx/weewxinst$ ./bin/weewxd weewx.conf
('Created packet: %s', "{'barometer': 29.681039574719435, 'windchill': 56.48, 'dewpoint': 52.656315478047,
'pressure': 29.681039574719435, 'outHumidity': 87, 'heatindex': 56.48, 'dateTime': 1413323976, 'windDir': 200,
'outTemp': 56.48, 'windSpeed': 14.47, 'rainRate': 43.33, 'usUnits': 1}")
LOOP:   2014-10-14 23:59:36 CEST (1413323976) {'barometer': 29.681039574719435, 'windchill': 56.48, 'dewpoint': 52.656315478047,
'pressure': 29.681039574719435, 'outHumidity': 87, 'heatindex': 56.48, 'dateTime': 1413323976, 'windDir': 200, 'outTemp': 56.48,
'windSpeed': 14.47, 'rainRate': 43.33, 'usUnits': 1}

# install weewx daemon in /etc/init.d (als root)
# aanpassen settings in daemon in GitHub  /opt/geonovum/sospilot/git/src/weewx/test/weewx-daemon.sh

# PATH should only include /usr/* if it runs after the mountnfs.sh script
WEEWX_HOME=/opt/weewx/weewxinst
PATH=/sbin:/usr/sbin:/bin:/usr/bin
WEEWX_BIN=$WEEWX_HOME/bin/weewxd
WEEWX_CFG=$WEEWX_HOME/weewx.conf
DESC="weewx weather system"
NAME=weewx
WEEWX_USER=sadmin:sadmin
PIDFILE=$WEEWX_HOME/$NAME.pid
DAEMON=$WEEWX_BIN
DAEMON_ARGS="--daemon --pidfile=$PIDFILE $WEEWX_CFG"
SCRIPTNAME=/etc/init.d/$NAME

cp /opt/geonovum/sospilot/git/src/weewx/test/weewx-daemon.sh /etc/init.d
update-rc.d weewx defaults
/etc/init.d/weewx start
/etc/init.d/weewx status
* Status of weewx weather system: running

# weewx log bekijken
tail -f /var/log/syslog

# memory in gaten houden
  PID USER      PR  NI    VIRT    RES    SHR  S  %CPU %MEM     TIME+ COMMAND
 4688 sadmin    20   0    170936  36776  4608 S   0.0  0.5   3:15.23 weewxd  (16.10.14 16:22)
 5269 sadmin    20   0    173920  39024  4792 S   0.0  0.5   2:07.12 weewxd
11.7. Tot hier gekomen op 25.5.2014
11.8. TODO
Onderstaande alleen installeren indien nodig.
11.8.1. Sphinx - Documentatie
Zie http://sphinx.pocoo.org. Sphinx is a tool that makes it easy to create intelligent and beautiful documentation, written by Georg Brandl and licensed under the BSD license.
Installatie Sphinx v1.1.3
$ apt-get install sphinx-doc
$ apt-get install python-sphinx

# 1.1.3
NIET MET easy_install -U Sphinx
Tutorial http://matplotlib.sourceforge.net/sampledoc. PDF generation installatie via Latex: http://linuxandfriends.com/2009/10/06/install-latex-in-ubuntu-linux.
apt-get install texlive-full
11.9. Installatie - Beheer
11.9.1. IPTables Firewall
https://help.ubuntu.com/community/IptablesHowTo
We laten alleen HTTP(S) en SSH door naar buiten (eth0/176.9.2.29 en fe80::5054:ff:fed8:5cf7 voor IPv6) en
Munin, poort 4949, voor binnen (eth1).
We doen dit met iptables en maken de rules persisten met iptables-persistent. Dit
moet voor IP v4 en v6!!
/opt/bin/iptables-start.sh,
# https://help.ubuntu.com/community/IptablesHowTo
# http://www.linux-noob.com/forums/index.php?/topic/1280-iptables-block-all-ports-except-20-21/
# complete tutorial: https://www.frozentux.net/iptables-tutorial/iptables-tutorial.html
iptables-stop.sh

iptables -P INPUT DROP
iptables -I INPUT 1 -i lo -j ACCEPT
iptables -A INPUT -m conntrack --ctstate ESTABLISHED,RELATED -j ACCEPT
iptables -A INPUT -i eth0 -p tcp --dport ssh -j ACCEPT
iptables -A INPUT -i eth0 -p tcp --dport 80 -j ACCEPT
iptables -A INPUT -i eth0 -p tcp --dport 443 -j ACCEPT
iptables -A INPUT -i eth1 -p tcp --dport 4949 -s 192.168.100.0/24 -j ACCEPT
SERVER_IP="176.9.2.29"
iptables -A INPUT -p icmp --icmp-type 8 -s 0/0 -d $SERVER_IP -m state --state NEW,ESTABLISHED,RELATED -j ACCEPT
iptables -A OUTPUT -p icmp --icmp-type 0 -s $SERVER_IP -d 0/0 -m state --state ESTABLISHED,RELATED -j ACCEPT
iptables -A OUTPUT -p icmp --icmp-type 8 -s $SERVER_IP -d 0/0 -m state --state NEW,ESTABLISHED,RELATED -j ACCEPT
iptables -A INPUT -p icmp --icmp-type 0 -s 0/0 -d $SERVER_IP -m state --state ESTABLISHED,RELATED -j ACCEPT
iptables -L -V

# en voor v6, let op -p icmpv6 --icmpv6-type
ip6tables -P INPUT DROP
ip6tables -I INPUT 1 -i lo -j ACCEPT
ip6tables -A INPUT -m conntrack --ctstate ESTABLISHED,RELATED -j ACCEPT
ip6tables -A INPUT -i eth0 -p tcp --dport ssh -j ACCEPT
ip6tables -A INPUT -i eth0 -p tcp --dport 80 -j ACCEPT
ip6tables -A INPUT -i eth0 -p tcp --dport 443 -j ACCEPT
SERVER_IP="fe80::5054:ff:fed8:5cf7"
# use --icmpv6-type
ip6tables -A INPUT -p icmpv6 --icmpv6-type 8 -s 0/0 -d $SERVER_IP -m state --state NEW,ESTABLISHED,RELATED -j ACCEPT
ip6tables -A OUTPUT -p icmpv6 --icmpv6-type 0 -s $SERVER_IP -d 0/0 -m state --state ESTABLISHED,RELATED -j ACCEPT
ip6tables -A OUTPUT -p icmpv6 --icmpv6-type 8 -s $SERVER_IP -d 0/0 -m state --state NEW,ESTABLISHED,RELATED -j ACCEPT
ip6tables -A INPUT -p icmpv6 --icmpv6-type 0 -s 0/0 -d $SERVER_IP -m state --state ESTABLISHED,RELATED -j ACCEPT
ip6tables -L -V
/opt/bin/iptables-stop.sh
    echo "Stopping firewall and allowing everyone..."
    iptables -F
    iptables -X
    iptables -t nat -F
    iptables -t nat -X
    iptables -t mangle -F
    iptables -t mangle -X
    iptables -P INPUT ACCEPT
    iptables -P FORWARD ACCEPT
    iptables -P OUTPUT ACCEPT
    iptables -L -V

    iptables -L -v
Chain INPUT (policy DROP 8 packets, 484 bytes)
 pkts bytes target     prot opt in     out     source               destination
   36 11344 ACCEPT     all  --  lo     any     anywhere             anywhere
  229 24367 ACCEPT     all  --  any    any     anywhere             anywhere             ctstate RELATED,ESTABLISHED
    2   128 ACCEPT     tcp  --  eth0   any     anywhere             anywhere             tcp dpt:ssh
    0     0 ACCEPT     tcp  --  eth0   any     anywhere             anywhere             tcp dpt:http
    0     0 ACCEPT     tcp  --  eth0   any     anywhere             anywhere             tcp dpt:https
    1    84 ACCEPT     icmp --  any    any     anywhere             static.29.2.9.176.clients.your-server.de  icmp echo-request state NEW,RELATED,ESTABLISHED
    0     0 ACCEPT     icmp --  any    any     anywhere             static.29.2.9.176.clients.your-server.de  icmp echo-reply state RELATED,ESTABLISHED

Chain FORWARD (policy ACCEPT 0 packets, 0 bytes)
 pkts bytes target     prot opt in     out     source               destination

Chain OUTPUT (policy ACCEPT 199 packets, 48858 bytes)
 pkts bytes target     prot opt in     out     source               destination
    2   168 ACCEPT     icmp --  any    any     static.29.2.9.176.clients.your-server.de  anywhere             icmp echo-reply state RELATED,ESTABLISHED
    0     0 ACCEPT     icmp --  any    any     static.29.2.9.176.clients.your-server.de  anywhere             icmp echo-request state NEW,RELATED,ESTABLISHED
Persistent maken over reboots met ip-tables-persistent http://tomearp.blogspot.nl/2012/07/using-iptables-save-and-restore-with.html
$ apt-get install iptables-persistent
$ ip6tables-save > /etc/iptables/rules.v6
$ iptables-save > /etc/iptables/rules.v4

# rules worden bewaard in /etc/iptables/rules.v4|6
$ cat /etc/iptables/rules.v4
# Generated by iptables-save v1.4.18 on Mon Dec 23 14:12:21 2013
*mangle
:PREROUTING ACCEPT [353:57105]
:INPUT ACCEPT [353:57105]
:FORWARD ACCEPT [0:0]
:OUTPUT ACCEPT [313:92148]
:POSTROUTING ACCEPT [313:92148]
COMMIT
# Completed on Mon Dec 23 14:12:21 2013
# Generated by iptables-save v1.4.18 on Mon Dec 23 14:12:21 2013
*nat
:PREROUTING ACCEPT [9:516]
:INPUT ACCEPT [0:0]
:OUTPUT ACCEPT [8:563]
:POSTROUTING ACCEPT [8:563]
COMMIT
# Completed on Mon Dec 23 14:12:21 2013
# Generated by iptables-save v1.4.18 on Mon Dec 23 14:12:21 2013
*filter
:INPUT DROP [9:516]
:FORWARD ACCEPT [0:0]
:OUTPUT ACCEPT [311:91932]
-A INPUT -i lo -j ACCEPT
-A INPUT -m conntrack --ctstate RELATED,ESTABLISHED -j ACCEPT
-A INPUT -i eth0 -p tcp -m tcp --dport 22 -j ACCEPT
-A INPUT -i eth0 -p tcp -m tcp --dport 80 -j ACCEPT
-A INPUT -i eth0 -p tcp -m tcp --dport 443 -j ACCEPT
-A INPUT -d 176.9.2.29/32 -p icmp -m icmp --icmp-type 8 -m state --state NEW,RELATED,ESTABLISHED -j ACCEPT
-A INPUT -d 176.9.2.29/32 -p icmp -m icmp --icmp-type 0 -m state --state RELATED,ESTABLISHED -j ACCEPT
-A OUTPUT -s 176.9.2.29/32 -p icmp -m icmp --icmp-type 0 -m state --state RELATED,ESTABLISHED -j ACCEPT
-A OUTPUT -s 176.9.2.29/32 -p icmp -m icmp --icmp-type 8 -m state --state NEW,RELATED,ESTABLISHED -j ACCEPT
COMMIT
# Completed on Mon Dec 23 14:12:21 2013

cat /etc/iptables/rules.v6
# Generated by ip6tables-save v1.4.18 on Mon Dec 23 14:29:44 2013
*mangle
:PREROUTING ACCEPT [0:0]
:INPUT ACCEPT [0:0]
:FORWARD ACCEPT [0:0]
:OUTPUT ACCEPT [0:0]
:POSTROUTING ACCEPT [0:0]
COMMIT
# Completed on Mon Dec 23 14:29:44 2013
# Generated by ip6tables-save v1.4.18 on Mon Dec 23 14:29:44 2013
*nat
:PREROUTING ACCEPT [0:0]
:INPUT ACCEPT [0:0]
:OUTPUT ACCEPT [0:0]
:POSTROUTING ACCEPT [0:0]
COMMIT
# Completed on Mon Dec 23 14:29:44 2013
# Generated by ip6tables-save v1.4.18 on Mon Dec 23 14:29:44 2013
*filter
:INPUT DROP [0:0]
:FORWARD ACCEPT [0:0]
:OUTPUT ACCEPT [0:0]
-A INPUT -i lo -j ACCEPT
-A INPUT -m conntrack --ctstate RELATED,ESTABLISHED -j ACCEPT
-A INPUT -i eth0 -p tcp -m tcp --dport 22 -j ACCEPT
-A INPUT -i eth0 -p tcp -m tcp --dport 80 -j ACCEPT
-A INPUT -i eth0 -p tcp -m tcp --dport 443 -j ACCEPT
-A INPUT -d fe80::5054:ff:fed8:5cf7/128 -p ipv6-icmp -m icmp6 --icmpv6-type 8 -m state --state NEW,RELATED,ESTABLISHED -j ACCEPT
-A INPUT -d fe80::5054:ff:fed8:5cf7/128 -p ipv6-icmp -m icmp6 --icmpv6-type 0 -m state --state RELATED,ESTABLISHED -j ACCEPT
-A OUTPUT -s fe80::5054:ff:fed8:5cf7/128 -p ipv6-icmp -m icmp6 --icmpv6-type 0 -m state --state RELATED,ESTABLISHED -j ACCEPT
-A OUTPUT -s fe80::5054:ff:fed8:5cf7/128 -p ipv6-icmp -m icmp6 --icmpv6-type 8 -m state --state NEW,RELATED,ESTABLISHED -j ACCEPT
COMMIT
# Completed on Mon Dec 23 14:29:44 2013
11.9.2. Webalizer
Zie http://www.mrunix.net/webalizer/. The Webalizer is a fast, free web server log file analysis program. It produces highly detailed, easily configurable usage reports in HTML format, for viewing with a standard web browser.
Installatie,
$ apt-get install webalizer
# installeer webalizer configuratie in /etc/webalizer/

# zorg dat output zichtbaar is via dir onder /var/www/default/sadm/webalizer

# enable DNS lookups
touch  /var/cache/webalizer/dns_cache.db
11.9.3. Optimaliseren van Tomcat
Zetten server parameters. Zie ook: http://docs.geoserver.org/stable/en/user/production/container.html
# in /etc/default/tomcat7
JAVA_OPTS="-Djava.awt.headless=true -server -Xmx8192M -Xms512M -XX:SoftRefLRUPolicyMSPerMB=36000 -XX:MaxPermSize=512m -XX:+UseParallelGC"
GDAL bindings, nu nog even, niet evt later.
# TODO (nu nog even niet)
# GDAL JNI
# WARNING: Native library load failed.java.lang.UnsatisfiedLinkError: no gdaljni in java.library.path

# try to install gdal java bindings
# see https://imageio-ext.dev.java.net/files/documents/7505/124115/ImageioExt-SetupGuide.pdf
# http://docs.geoserver.org/stable/en/user/data/raster/gdal.html
apt-get install swig
# Be sure you have properly downloaded SWIG, the Simplified Wrapper and Interface Generator
# which allow to produce JAVA bindings for C/C++ code. You can obtain it by simply running:
11.9.4. Break-in attempts blokkeren met denyhosts
Zie http://denyhosts.sourceforge.net
Analyseert de /var/log/auth.log file op break-in en herhaaldelijk inloggen (bijv. dictionary attacks) en voegt hosts toe aan /etc/hosts.deny
apt-get install denyhosts

# installs 2.6-10
Configuratie in /etc/denyhosts.cfg (email adres en Subject aanpassen)
Om deblokkeren, zie. Data files staan onder /var/lib: http://www.cyberciti.biz/faq/linux-unix-delete-remove-ip-address-that-denyhosts-blocked/
11.9.5. Optimaliseren van Java
Dit is nodig met name om image-rendering te optimaliseren binnen alle Java-gebaseerde tools zoals GeoServer. Moet opnieuw bij elke Java JDK upgrade...
Zie http://docs.geoserver.org/stable/en/user/production/java.html. NB dit moet iedere keer als de sun-java JDK wordt geupgrade !! En recenter: http://geoserver.geo-solutions.it/edu/en/install_run/jai_io_install.html
Go to the JAI download page and download the Linux installer for version 1.1.3, choosing the appropriate architecture:

i586 for the 32 bit systems
amd64 for the 64 bit ones (even if using Intel processors)
Copy the file into the directory containing the JDK/JRE and then run it. For example, on an Ubuntu 32 bit system:

# install JAI+JAI imageIO
# Go to the JAI download page and download the Linux installer for version 1.1.3,
# choosing the appropriate architecture:
# i586 for the 32 bit systems
# amd64 for the 64 bit ones (even if using Intel processors)

$ mkdir /opt/jai+imageio
$ wget http://download.java.net/media/jai/builds/release/1_1_3/jai-1_1_3-lib-linux-amd64-jdk.bin
$ wget http://download.java.net/media/jai-imageio/builds/release/1.1/jai_imageio-1_1-lib-linux-amd64-jdk.bin

# Copy the file into the directory containing the JDK/JRE and then run it. For example, on an Ubuntu 64 bit system:

Script
#!/bin/sh
# Copy the file into the directory containing the JDK/JRE and then run it. For example, on an Ubuntu 64 bit system:
# Do this as root! sudo su - first
cp /opt/jai+imageio/jai-1_1_3-lib-linux-amd64-jdk.bin /usr/lib/jvm/java-7-oracle/
cd /usr/lib/jvm/java-7-oracle/
sh jai-1_1_3-lib-linux-amd64-jdk.bin
    # accept license
rm jai-1_1_3-lib-linux-amd64-jdk.bin

    # Then jai_imageio
    # If you encounter difficulties (Unpacking...
    # tail: cannot open ‘+215’ for reading:
    # No such file or directory) , you may need to export the environment variable
    # _POSIX2_VERSION=199209. For example, on a Ubuntu 64 bit Linux system:

cp /opt/jai+imageio/jai_imageio-1_1-lib-linux-amd64-jdk.bin /usr/lib/jvm/java-7-oracle/
cd /usr/lib/jvm/java-7-oracle/
export _POSIX2_VERSION=199209
sh jai_imageio-1_1-lib-linux-amd64-jdk.bin
# accept license
rm jai_imageio-1_1-lib-linux-amd64-jdk.bin
11.9.6. Extra Fonts
Hoeft blijkbaar niet bij elke Java JDK upgrade...
Installeren MS fonts zie http://corefonts.sourceforge.net en http://embraceubuntu.com/2005/09/09/installing-microsoft-fonts.
apt-get install msttcorefonts
# installs in /usr/share/fonts/truetype/msttcorefonts
Installeren fonts in Java (for geoserver).
- Few fonts are included with Java by default, and for most people the the official documentation falls short of a useful explanation. It is unclear exactly where Java looks for fonts, so the easiest way to solve this problems is to copy whatever you need to a path guaranteed to be read by Java, which in our case is
/usr/lib/jvm/java-7-oracle- First install the fonts you want. The MS Core Fonts (Arial, Times New Roman, Verdana etc.) can be installed by following the instructions on http://corefonts.sourceforge.net/.
- Now copy the .ttf files to
/usr/lib/jvm/java-7-oracle/and run (ttmkfdir is obsolete??),- from http://askubuntu.com/questions/22448/not-all-ttf-fonts-visible-from-the-sun-jdk this install
Commands
mkfontscale
mkfontdir
fc-cache -f -v
All that remains is to restart any Java processes you have running, and the new fonts should be available.
11.9.7. UMN MapServer
Volgens de website www.mapserver.org.
MapServer is an Open Source platform for publishing spatial data and interactive mapping applications to the web. Originally developed in the mid-1990’s at the University of Minnesota, MapServer is released under an MIT-style license, and runs on all major platforms.
Installatie is simpel via APT.
apt-get install mapserver-bin
# Setting up mapserver-bin (6.4.0-5~saucy3)

# ook de CGI installeren
apt-get install cgi-mapserver
# Setting up cgi-mapserver (6.4.0-5~saucy3)
# installs mapserv in /usr/lib/cgi-bin

# installatie testen
/usr/lib/cgi-bin/mapserv -v
MapServer version 6.4.0 OUTPUT=GIF OUTPUT=PNG OUTPUT=JPEG OUTPUT=KML SUPPORTS=PROJ
SUPPORTS=GD SUPPORTS=AGG SUPPORTS=FREETYPE SUPPORTS=CAIRO SUPPORTS=SVG_SYMBOLS SUPPORTS=RSVG
SUPPORTS=ICONV SUPPORTS=FRIBIDI SUPPORTS=WMS_SERVER SUPPORTS=WMS_CLIENT
SUPPORTS=WFS_SERVER SUPPORTS=WFS_CLIENT
SUPPORTS=WCS_SERVER SUPPORTS=SOS_SERVER SUPPORTS=FASTCGI SUPPORTS=THREADS
SUPPORTS=GEOS INPUT=JPEG INPUT=POSTGIS INPUT=OGR INPUT=GDAL INPUT=SHAPEFILE
Een UMN MapServer tutorial http://mapserver.gis.umn.edu/new_users
In Apache CGI enablen: uncomment AddHandler cgi-script .cgi
Gebruik van CGI wrapper zodat lelijke map= uit URL kan staat op http://mapserver.gis.umn.edu/docs/howto/cgi-wrapper-script. Hieronder een voorbeeld van een CGI wrapper:
#!/bin/sh
# shortcut for mapserver with specific mapfile
# allows friendly URLs like http://my.com/ms/map1?service=wms...
# i.s.o. cgi with full mapfile path
#
MAPSERV="/usr/lib/cgi-bin/mapserv"
MAPFILE="/home/ticheler/kadaster_webapp/umn_kadkaart/kadaster_nl_topografie.map"

if [ "${REQUEST_METHOD}" = "GET" ]; then
  if [ -z "${QUERY_STRING}" ]; then
    QUERY_STRING="map=${MAPFILE}"
  else
    QUERY_STRING="map=${MAPFILE}&${QUERY_STRING}"
  fi
  exec ${MAPSERV}
else
  echo "Sorry, I only understand GET requests."
fi
exit 1
11.9.8. MapProxy
Zie http://mapproxy.org/docs/latest/install.html.
$ apt-get install python-imaging python-yaml libproj0
$ apt-get install libgeos-dev python-lxml libgdal-dev python-shapely

# Setting up python-shapely (1.2.14-1) ...
$ apt-get install build-essential python-dev libjpeg-dev zlib1g-dev libfreetype6-dev
$ pip install Pillow
# was already installed in
# /usr/lib/python2.7/dist-packages: Pillow-2.0.0
$ pip install MapProxy
# ... Downloading MapProxy-1.6.0.tar.gz
$ mapproxy-util --version
# Mapproxy 1.6.0
11.9.9. MongoDB Beheer
Met http://www.phpmoadmin.com, wel eerst PHP5 MongoDB driver installeren: `` apt-get install php5-mongo``. Verder is beheer URL afgeschermd.